



Construye el Robot Seguidor de Línea más Simple con Arduino y SparkFun L298
Componentes y suministros
| Componente | Cantidad |
|---|---|
| Arduino UNO | 1 |
| Driver dual H-Bridge L298 SparkFun | 1 |
| Sensor IR | 2 |
| Cables jumper (genéricos) | 1 |
Herramientas y máquinas necesarias
- Pistola de pegamento caliente (genérica)
- Destornillador
- Kit robot seguidor de línea
Aplicaciones y servicios en línea
- Arduino IDE
Sobre el proyecto
El robot seguidor de línea es el "Hola Mundo" de la robótica. Este seguidor de línea es muy simple, fácil de construir.
Código
Robot Seguidor de Línea Basado en Arduino (C/C++)
/*------- Definiendo Entradas ------*/
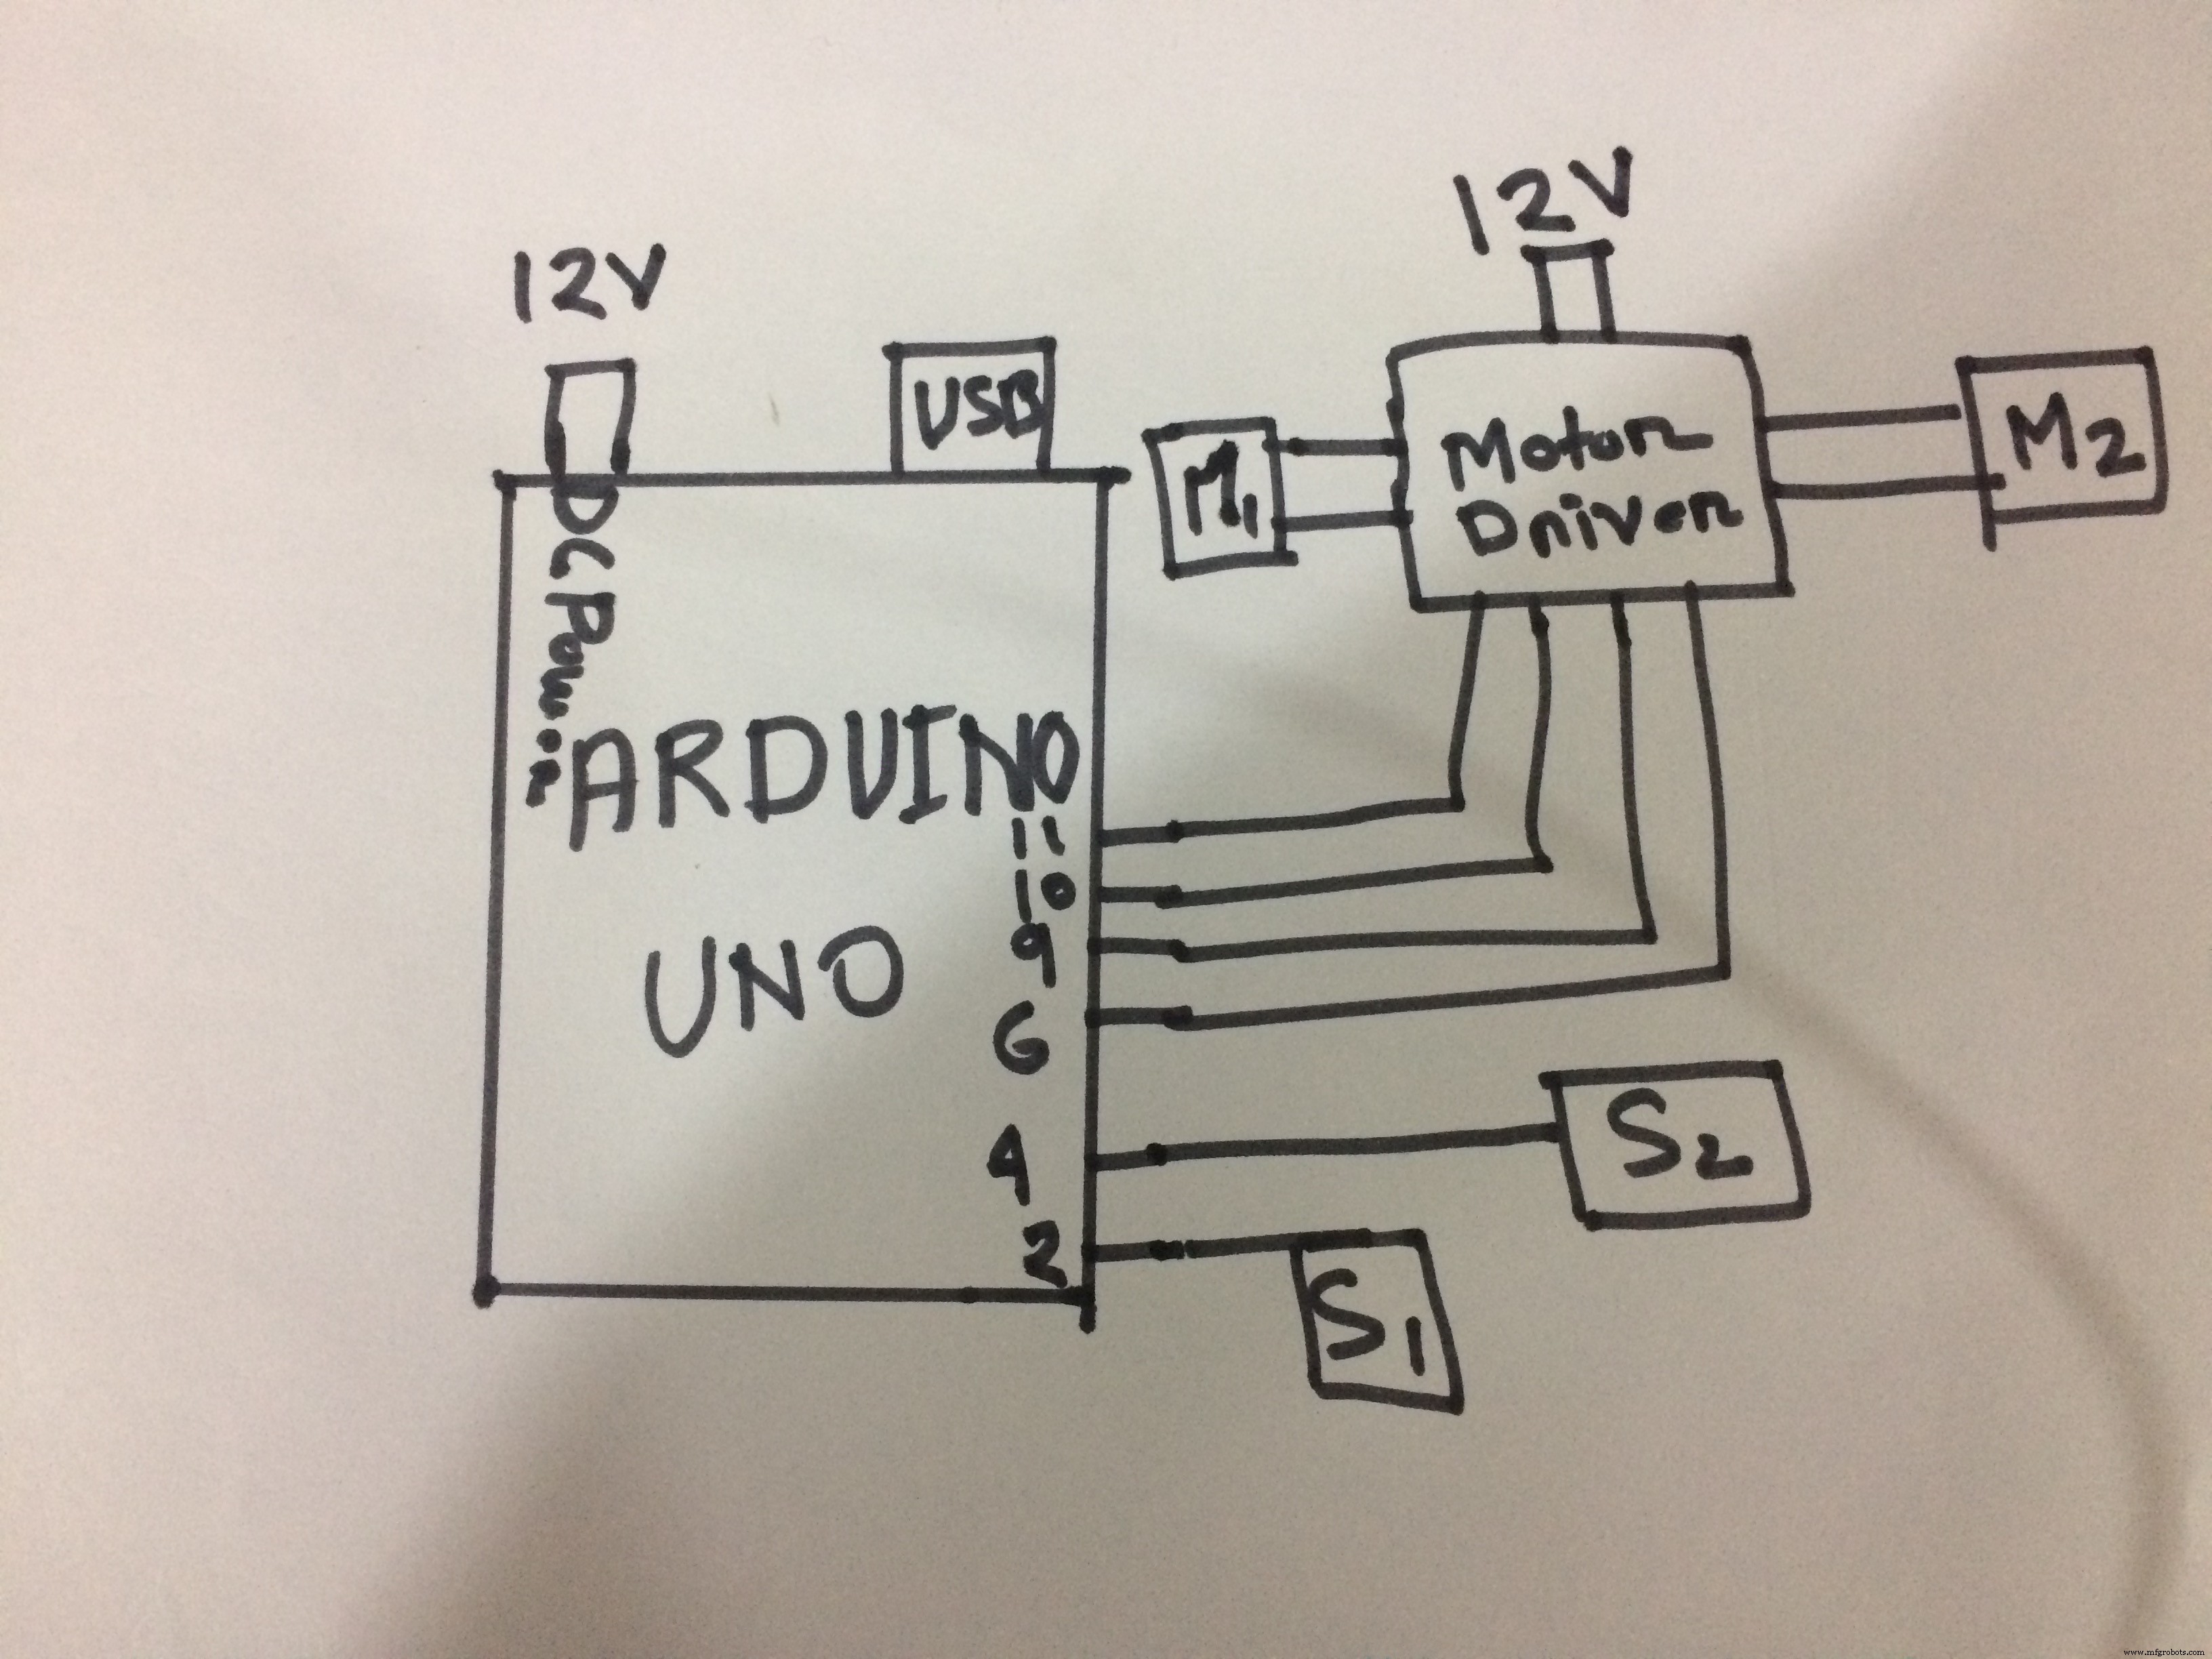
#define LS 2  // Sensor izquierdo
#define RS 5  // Sensor derecho

/*------- Definiendo Salidas ------*/
#define LM1 11 // Motor izquierdo
#define LM2 10 // Motor izquierdo
#define RM1 9  // Motor derecho
#define RM2 6  // Motor derecho

void setup() {
  pinMode(LS, INPUT);
  pinMode(RS, INPUT);
  pinMode(LM1, OUTPUT);
  pinMode(LM2, OUTPUT);
  pinMode(RM1, OUTPUT);
  pinMode(RM2, OUTPUT);
}

void loop() {
  if ((digitalRead(LS) == LOW) && (digitalRead(RS) == LOW)) // Condición 1: Avanzar
    MoveForward();
  if ((digitalRead(LS) == HIGH) && (digitalRead(RS) == HIGH)) // Condición 2: Parar
    Stop();
  if ((digitalRead(LS) == LOW) && (digitalRead(RS) == HIGH)) // Derecha
    TurnLeft();
  if ((digitalRead(LS) == HIGH) && (digitalRead(RS) == LOW)) // Izquierda
    TurnRight();
}

void MoveForward() {
  analogWrite(LM1, 50); analogWrite(LM2, 0);
  analogWrite(RM1, 50); analogWrite(RM2, 0);
  delay(20);
}

void TurnRight() {
  analogWrite(LM1, 0); analogWrite(LM2, 60);
  analogWrite(RM1, 60); analogWrite(RM2, 0);
  delay(30);
}

void TurnLeft() {
  analogWrite(LM1, 60); analogWrite(LM2, 0);
  analogWrite(RM1, 0); analogWrite(RM2, 60);
  delay(30);
}

void Stop() {
  analogWrite(LM1, 0); analogWrite(LM2, 0);
  analogWrite(RM1, 0); analogWrite(RM2, 0);
  delay(20);
}
Esquemáticos
Controla 65.280 Relés con Arduino: Soluciones Expandibles de E/S y Relés
Automatización del Hogar Inteligente con Conectividad Bluetooth
Proceso de manufactura
- Proyecto Dados Digitales Arduino: Construye tu Propio Generador de Números Aleatorios con LCD
- Construye un Iron Man animado con Arduino: componentes, sensores y guía paso a paso
- Robot seguidor de línea V4 – Sistema avanzado con Arduino Nano y PCB a medida
- Find Me: Localizador Inteligente de Objetos con Arduino y Bluetooth
- Robot Seguidor de Línea Autónomo con Arduino UNO: Guía Paso a Paso
- Construye un Brazo Robótico Impreso en 3D Controlado por Arduino – Guía Paso a Paso
- Controlador de Humidificador DIY con Arduino y Relé: Configuración Segura de Alto Voltaje
- Construye un robot controlado por voz con Arduino Nano
- MobBob: Robot Arduino Impreso en 3D, Controlado por Smartphone Android
- PiBot: Robot Pianista con Arduino para Interpretación Musical de Precisión
- Pong Neón en Matriz NeoPixel con Arduino Nano