


Microfusión de piezas impresas en 3D con resinas calcinables
Microfusión o fundición a la cera perdida es uno de los métodos de fabricación más ampliamente utilizados en la industria de la joyería y es el proceso de fundición más antiguo que se conoce.
La fundición permite obtener réplicas en metal mediante un molde que se elabora a partir de un prototipo modelado tradicionalmente en cera. En este caso, se utilizan piezas impresas en 3D con resinas calcinables para reemplazar los modelos de cera.
Las joyas se pueden fabricar con una variedad de metales, incluidos oro, platino, plata y latón , utilizando el proceso de fundición. A continuación puedes ver el proceso de microfusión para joyería a partir de piezas impresas en 3D con resinas calcinables:
1- Impresión 3D de la pieza
Basado en diseños creados con software CAD, los modelos deseados deben ser impresos en 3D. Actualmente existe un gran número de resinas calcinables disponibles de diferentes fabricantes. El uso de un material u otro depende de la impresora 3D utilizada y de las características requeridas para las piezas.
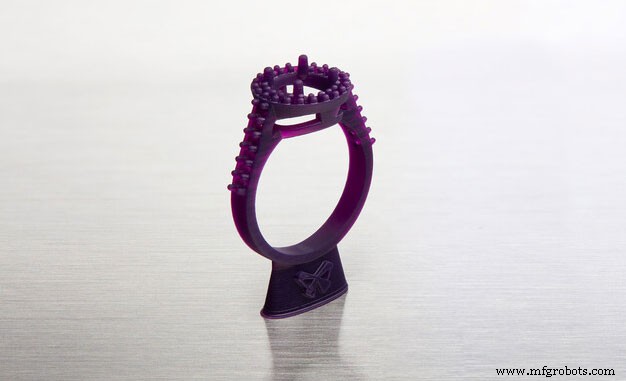
Imagen 1:Anillo impreso en 3D con resina calcinable de FormLabs. Fuente:FormLabs.
Una de las impresoras 3D más populares para la impresión 3D en el sector de la joyería es la Form3 del reconocido fabricante FormLabs. Esta impresora 3D no requiere conocimientos técnicos avanzados y, por lo tanto, se puede utilizar sin dificultad . La impresora 3D Form3 limita su uso a solo materiales compatibles desarrollados por el fabricante. Esto puede ser una ventaja, ya que no se requiere configuración y los parámetros de configuración y los valores modificables se reducen al mínimo, con solo seleccionar el tipo de material y algunos parámetros básicos. Esto reduce el margen de error al mínimo.
La siguiente tabla muestra algunas de las resinas combustibles más populares y su compatibilidad con las impresoras 3D:
| Resina | Fabricante | Tecnología | Compatibilidad |
|---|---|---|---|
| Cera Calcinable | FormLabs | SLA | Forma 2, Forma 3, Forma 3L, Forma3+ |
| Cera Calcinable 40 | FormLabs | SLA | Forma 2, Forma 3, Forma 3L, Forma3+ |
| zÁmbar de cera | UniZ | LCD | Slash, Slash 2, Slash 2 Plus, Slash 2 Pro |
| zPúrpura cera | UniZ | LCD | Slash, Slash 2, Slash 2 Plus, Slash 2 Pro |
| Bluecast original | Zortrax | LCD | UniZ, WANHAO, zortrax, ANYCUBIC, ASIGA, B9 Creator, FLASH FORGE Moon Ray, Prusa. |
| Bluecast X5 | Zortrax | LCD | UniZ, WANHAO, zortrax, ANYCUBIC, ASIGA, B9 Creator, FLASH FORGE Moon Ray, Prusa. |
| Bluecast X10 | Zortrax | LCD | UniZ, WANHAO, zortrax, ANYCUBIC, ASIGA, B9 Creator, FLASH FORGE Moon Ray, Prusa. |
| Dental Cast | Harz Labs | LCD | Formlabs, PEOPOLY, UniZ, WANHAO, zortrax, ANYCUBIC, ASIGA, B9 Creator, FLASH FORGE Moon Ray, Prusa. |
Table 1:Burn-out resins and compatibility. Fuente:Filament2print.
Each material has different properties and requires different parameters. However, they all have a common characteristic:they have been developed to replace wax parts in the microfusion process, with a composition that achieves castings free of residues that could affect the final result of the parts.
Once the parts have been printed, they must be cured if the material requires it. This depends on the composition of the resin and the manufacturer's advice should always be followed to achieve an optimum result.
2- Wax tree
Once the parts are cured (in cases where this step is required), the removal of the backing can be carried out, always with great care. Sandpaper (400 grit or higher) or even a rotary tool with a polishing attachment can be used to achieve total removal of the support and a perfect finish.
To create the wax tree, a wax base is taken and attached to a rubber cover of the sprue. Small cylindrical wax rods are welded to the wax base using a heat tool. The 3D printed parts are welded to the other end of the bars.
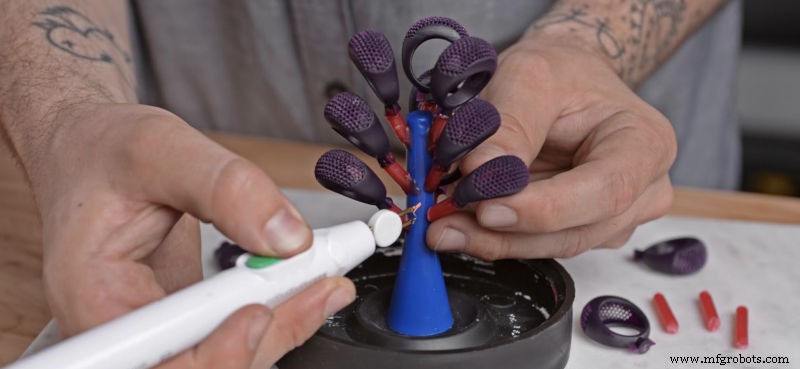
Image 2:Casting wax tree. Source:FormLabs.
This process is similar to that carried out in microfusion when casting traditionally carved wax pieces.
3- Mould preparation
The wax tree with the 3D printed parts in burn-out resin is to be placed inside a refractory steel cylinder, which is to be fitted into the rubber cylinder cover. In case the refractory steel cylinder has holes, these should be covered by wrapping the cylinder in adhesive tape.
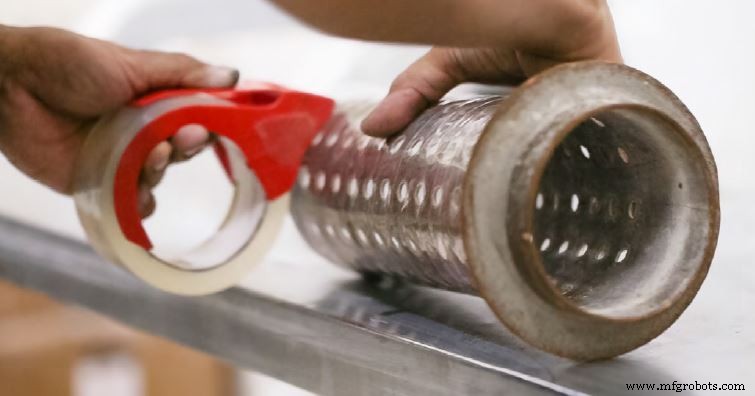
Image 3:Refractory steel cylinder shell. Source:Formlabs.
The casting must then be poured slowly, always from the side of the cylinder to avoid damaging the tree with the parts 3D printed with calcineable resin.
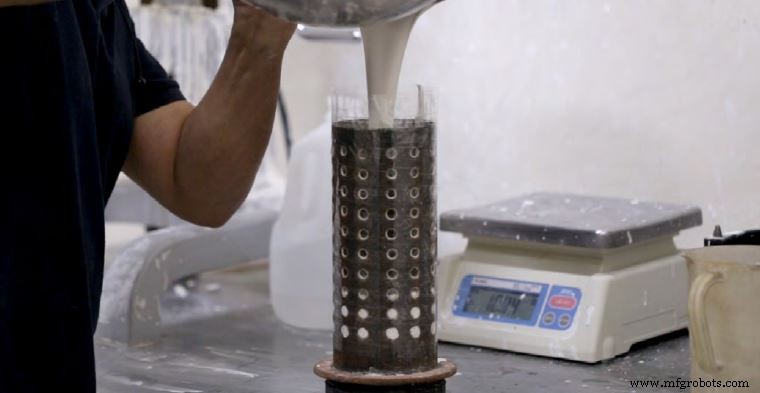
Image 4:Pouring of the casting into a refractory steel cylinder. Source:Formlabs.
When pouring the casting, it is possible that small air pockets may remain which can affect the quality of the final parts. For this reason, it is very important to carry out the degassing process in a vacuum chamber.
4- Burnout
The cylinder is placed in the oven following the time and temperature instructions recommended by the manufacturer. During this time, the wax will burn out without leaving residues, leaving the mould ready.
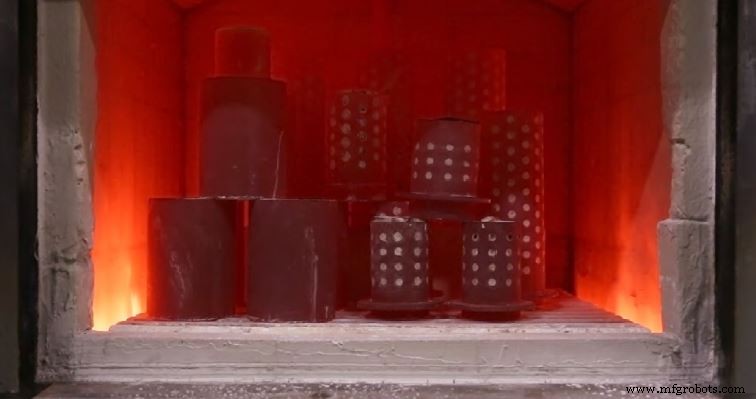
Image 5:Burnout process. Source:Formlabs.
The desired metal must then be poured into the mould to produce the final parts.
5- Washing and polishing
After casting, the mould is carefully removed from the furnace and immersed in water using tongs. During this process, the casting will melt, leaving the metal parts visible. Once washed, the metal parts are separated from the tree, polished and polished until the desired finish is achieved.
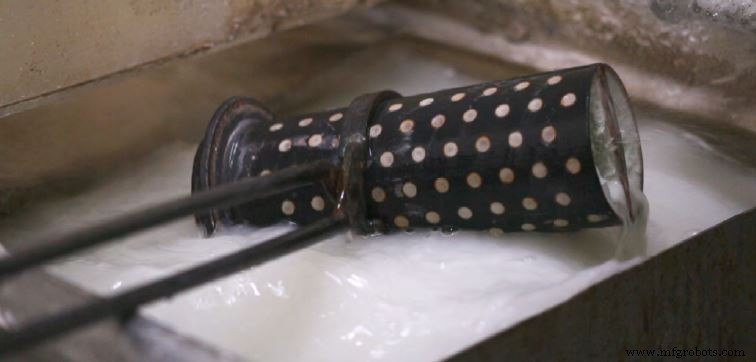
Image 6:Washing process. Source:Formlabs.
Once washed, the metal parts are separated from the tree, polished and polished to the desired finish.
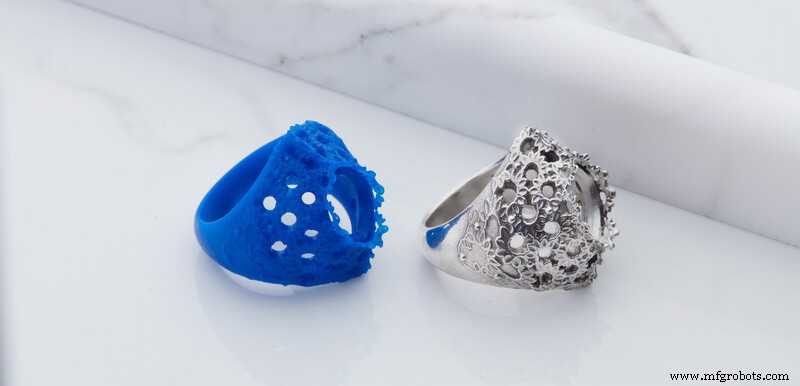
Image 7:3D printed ring with burn-out resin and silver ring after the microfusion process. Source:Formlabs.
The use of castable resins in the jewellery sector offers numerous advantages . Among others, it allows you to 3D print as many models as you want, quickly and with extreme precision . This results in a significant reduction in costs and production times.
Impresión 3d
- Soldadura y encolado de piezas de plástico impresas en 3D
- ¿Debería terminar sus piezas impresas en 3D internamente?
- ¿Acabado de piezas impresas en 3D con… crayones?
- Introducción a la impresión 3D con sinterización selectiva por láser
- Impresión 3D con resinas:Introducción
- Cómo hacer que las piezas de metal sean más ligeras con la impresión 3D de metal
- Impresión del fusible 1 con el fusible 1
- Reemplazo de piezas de aluminio con fibra de carbono impresa en 3D
- Mejor control de calidad con piezas impresas en 3D
- ¡Abróchate el cinturón con piezas funcionales impresas en 3D!
- Re-imaginando el Go Kart con piezas impresas en 3D